



Knowing how to clean your water tank at home is essential for maintaining safe, clean, and healthy water for everyday use. Over time, overhead and underground water tanks can accumulate dirt, sediment, algae, bacteria, and other contaminants that affect water quality and hygiene.
Regular cleaning not only improves water safety but also extends the life of your storage tank and plumbing system. Whether you have a plastic, concrete, or stainless steel tank, this guide explains the step-by-step cleaning process, the tools you'll need, safety precautions, and how often you should clean your water tank.
Why Regular Water Tank Cleaning Is Important
Water tanks are designed to store water, but sediment and contaminants can gradually accumulate at the bottom and along the internal surfaces. A tank that is not cleaned periodically can become a source of contamination, therefore water tank maintenance is important.
Regular water tank cleaning helps remove accumulated sediment and deposits and provides an opportunity to inspect the tank for damage, unwanted materials, or other problems. WHO guidance recommends draining, removing sediment, cleaning internal walls, and disinfecting storage tanks when cleaning is required. It helps to protect the plumbing system and supports better hygiene.
Signs Your Water Tank Needs Cleaning
You don't always need to wait until the water looks visibly dirty before inspecting your tank. Look for these warning signs given below.
- Sediment at the Bottom: If you can safely inspect the tank without entering it, a visible layer of sediment at the bottom indicates that cleaning may be needed.
- Unusual Smell or Taste: An unexpected odour or taste can indicate contamination, stagnant water, deposits, or problems elsewhere in the water system.
- Cloudy Water: Water that suddenly becomes cloudy or contains visible particles should be investigated rather than ignored.
- Algae or Slime: Greenish growth or slippery deposits on accessible internal surfaces can indicate prolonged exposure to light or unsuitable storage conditions.
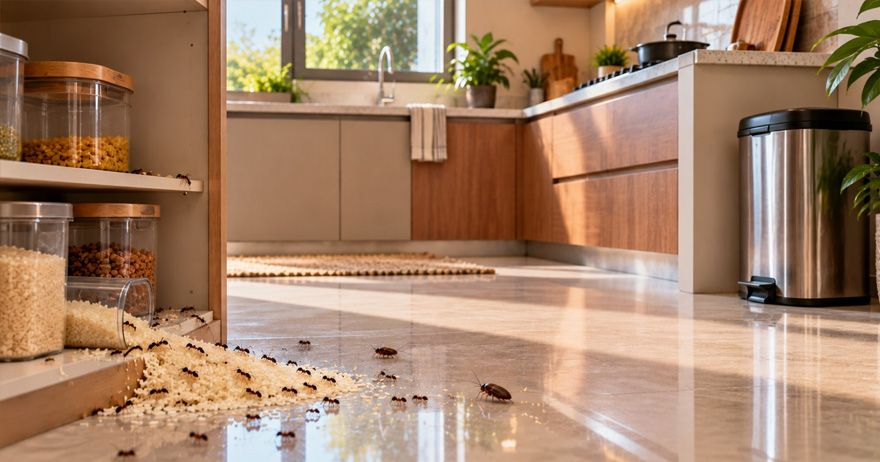
- Insects or Debris: Leaves, insects, animal contamination, or other foreign material indicate that the tank or its cover needs attention.
- Recent Contamination Event: If an animal enters the tank, sewage or dirty water enters the system, or another contamination event occurs, cleaning and disinfection may be necessary.
Tools and Safety Equipment You'll Need
Before starting home water tank cleaning, collect the appropriate equipment and make sure you have a safe way to access the tank.
Basic Cleaning Equipment
- Clean bucket or suitable container
- Stiff-bristled cleaning brush
- Long-handled brush for difficult-to-reach areas
- Clean hose
- Clean water for rinsing
- Suitable pump for draining larger tanks
- Clean cloths or sponges for accessible surfaces
Personal Protective Equipment
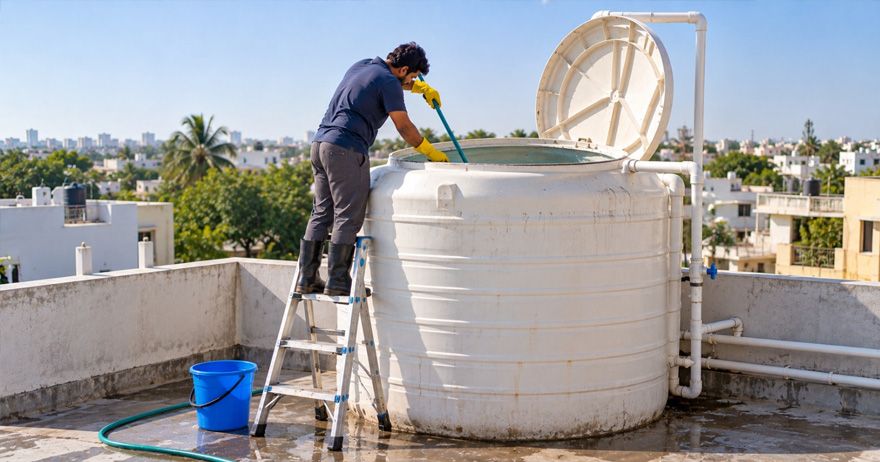
- Waterproof gloves
- Protective footwear
- Eye protection where splashing is possible
- Appropriate protective clothing
Note: Do not enter an underground or enclosed tank simply to clean it yourself. A confined space can present serious risks, including limited ventilation and hazardous conditions.
Step-by-Step Process to Clean a Water Tank
The step-by-step water tank cleaning process is given below.
Step 1: Arrange an Alternative Water Supply
Before draining the tank, make sure your household has enough safe water for drinking, cooking, bathing, and other essential activities.
Step 2: Switch Off the Water Supply
Stop the incoming water supply before beginning the cleaning process. If the tank has a pump, follow the manufacturer's instructions for safely switching off the relevant equipment.
Step 3: Drain the Tank
Drain the stored water through the appropriate outlet or washout arrangement.
Step 4: Remove Sediment and Debris
Once the tank is sufficiently empty, remove accumulated sediment, dirt, leaves, and other debris using appropriate tools.
Step 5: Scrub the Internal Surfaces
Use a suitable stiff brush and clean water to scrub accessible walls, corners, joints, and the bottom of the tank.
Step 6: Rinse Thoroughly
Rinse the internal surfaces with clean water and remove the wastewater. Continue rinsing until loose dirt and cleaning residues have been removed.
Step 7: Inspect the Tank
Check the tank for cracks, leaks, damaged covers, broken fittings, blocked overflow pipes, damaged inlet or outlet connections and accumulated deposits.
Step 8: Disinfect the Tank
After physical cleaning, the tank may need disinfection. The appropriate method and chlorine concentration depend on the tank volume, product used, and purpose of disinfection.
Step 9: Flush the Tank
After the required contact time, completely drain the disinfecting solution and flush the tank with clean water as appropriate.
Step 10: Refill and Protect the Tank
Refill the tank with clean water and securely close the cover. Make sure the tank remains protected from dust, insects, animals, and other sources of contamination.
How to Disinfect a Water Tank Properly
Cleaning and disinfection are two different steps. Cleaning physically removes sediment, dirt, and deposits, while disinfection is intended to reduce microorganisms. Proper water tank disinfection should therefore take place after physical cleaning rather than being treated as a substitute for scrubbing and removing sediment.
Firstly, use an appropriate disinfectant, then calculate the tank volume to determine the volume of the disinfecting solution, Follow the product instruction, provide required contact time for the disinfectant, finally drain and flush. Be cautious to never mix different cleaning chemicals.
How Often Should You Clean Your Water Tank?
The ideal frequency depends on the quality of incoming water, the type of tank, environmental conditions, how well the tank is covered, and whether sediment or contamination is accumulating. As a general household practice, many homeowners schedule inspection and cleaning at least once or twice a year.
Overhead Tanks
Overhead water tank cleaning should include checking the lid, inlet, overflow pipe, and surrounding area in addition to cleaning the tank itself.
Underground Tanks
Underground water tank cleaning can require additional precautions because access and ventilation may be more difficult.
Tips to Keep Your Water Tank Clean for Longer
Some simple water tank cleaning tips are given below that can help you reduce contamination between major cleaning sessions.
Keep the Tank Covered
A properly fitted lid helps prevent dust, insects, leaves, animals, and other contaminants from entering the tank.
Check the Cover Regularly
A cracked or poorly fitted cover can make an otherwise clean tank vulnerable to contamination.
Keep the Surrounding Area Clean
Avoid storing waste, chemicals, construction materials, or other contaminants near tank access points.
Inspect Inlet and Overflow Pipes
Make sure pipes are properly fitted and protected from insects and other sources of contamination.
Prevent Light From Entering
Where appropriate for the tank design, limiting light exposure can help reduce algae growth.
Fix Leaks Promptly
Water leaks around plumbing connections can create damp areas and introduce contaminants into the surrounding environment.
Inspect Before Reusing Stored Water
If a tank has been unused for a long period, inspect it before returning it to regular household use.
Common Water Tank Cleaning Mistakes to Avoid
Avoid these below mistakes when carrying out home water tank cleaning.
- Cleaning Without Turning Off the Water Supply: Stop the incoming supply and relevant equipment before starting the cleaning process.
- Skipping Sediment Removal: Disinfection alone doesn't remove accumulated dirt and sediment.
- Using Too Much Disinfectant: The appropriate amount depends on the product concentration, tank volume, and intended procedure.
- Mixing Cleaning Chemicals: Never mix bleach or chlorine products with acids, ammonia, or other household cleaners.
- Failing to Flush After Disinfection: Residual disinfectant should be removed appropriately before the tank is returned to normal use.
- Entering a Tank Without Proper Safety Measures: Underground and enclosed tanks can be hazardous confined spaces. Do not enter them without appropriate professional procedures.
- Using Dirty Tools: Brushes, buckets, hoses, and other equipment should be clean and suitable for the task to avoid reintroducing contaminants.
- Ignoring the Tank Cover: Cleaning the tank but leaving a damaged or poorly fitted cover can allow it to become contaminated again.
- Cleaning Only When Water Looks Dirty: Follow a regular inspection and maintenance routine rather than relying only on appearance.
DIY vs Professional Water Tank Cleaning
Whether you should clean the tank yourself depends largely on its size, accessibility, condition, and construction. When you need DIY or professional help for water storage tank cleaning is given below.
| Factor | DIY Cleaning | Professional Cleaning |
|---|---|---|
| Small accessible tank | Often practical | Also suitable |
| Large tank | More difficult | Recommended |
| Underground tank | Higher safety concerns | Generally preferable |
| Confined-space entry | Not appropriate without specialist procedures | Trained professionals can manage appropriate procedures |
| Basic sediment removal | Possible for accessible tanks | Included |
| Disinfection | Requires careful product handling | Professionals can follow appropriate procedures |
| Deep cleaning | Limited by accessibility | Better equipment and experience |
| Time required | Depends on household setup | Usually more efficient |
| Safety | Homeowner must manage risks | Professionals have appropriate equipment and procedures |
Final Thoughts
Knowing how to clean water tank at home is an important part of maintaining a clean and reliable household water supply. Regular inspection, physical cleaning, appropriate disinfection, and proper protection from recontamination can help keep stored water in better condition. Ultimately, good water tank hygiene is about keeping the tank covered, maintaining its fittings, preventing contamination, fixing leaks, and checking water quality regularly are all part of responsible household water storage.