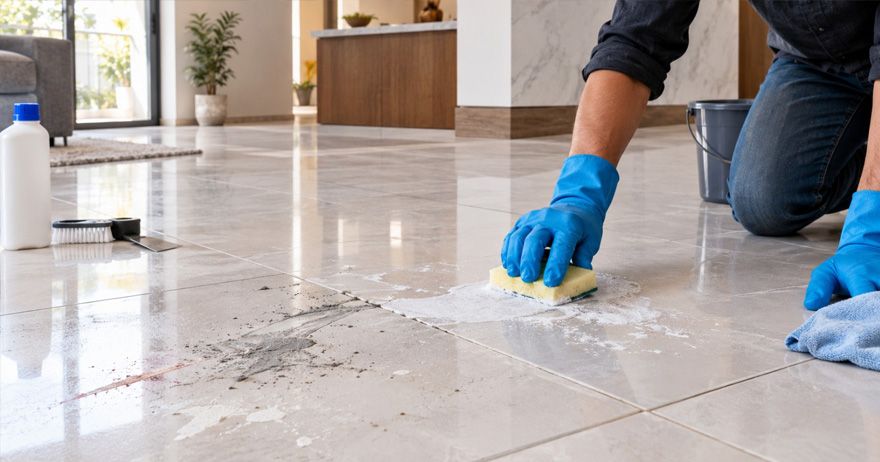
Removing paint, cement and grout marks from tiles comes down to one rule: identify the tile before you pick the cleaner. Acid removes cement quickly from vitrified and ceramic tiles, and permanently damages marble, Kota stone and most natural stone.
The second rule is patience. Soaking a stain and lifting it with a plastic scraper beats attacking it with a blade. Most damaged tiles in new homes are damaged by the cleaning, not the stain.
Two warnings. Never mix acid with bleach or any chlorine cleaner — the combination releases chlorine gas, dangerous in an enclosed bathroom. And test any cleaner on a hidden patch first.
Why Do Tiles Get Paint, Cement and Grout Marks?
Tiles are laid before painting and the final fit-out, so they sit exposed through the messiest weeks of the job. Four things end up on them: cement splashes, grout haze left when grout is not cleaned off within a day, paint drips, and adhesive residue from fixing skirting and sanitaryware. All four are far easier to remove within 24 to 48 hours.
Identify the Type of Tile Before Cleaning
| Tile type | Acid safe? | Notes |
|---|---|---|
| Glazed ceramic | Yes; diluted | Grout still at risk |
| Vitrified / porcelain | Yes; diluted | Most tolerant of the common tiles |
| Matt or anti-skid | Careful | Texture traps residue and holds cleaner |
| Marble | No | Etches permanently; leaving dull patches |
| Granite | Avoid | Dulls the polish; damages the sealer |
| Kota; limestone; sandstone | No | Calcium-based; etches like marble |
| Mosaic and glass | Careful | Acid attacks the grout faster |
If unsure, assume natural stone and avoid acid. Quick check: put a drop of vinegar on a hidden corner and wait five minutes. If it fizzes or leaves a dull mark, acid is out.
How to Remove Fresh Paint From Tiles
Act immediately. For water-based emulsion, wipe with a damp cloth while wet; if it has started to set, lay a wet cloth over it for ten minutes first. For oil-based enamel or primer, use mineral turpentine on a cloth, then wash with soapy water. Work from the outside of the splash inwards.
How to Remove Dried Paint Without Scratching Tiles
Dried paint needs softening, not force.
- Soak the spot with a hot soapy cloth for 15 to 20 minutes. Emulsion often lifts with nothing more.
- Scrape at a low angle with a plastic scraper, edge almost flat to the tile.
- If it resists, use mineral turpentine on a cloth for a few minutes.
- Rinse with soapy water, then clean water.
On glazed or vitrified tiles only, a new blade held almost flat can shift stubborn spots — keep it wet, work slowly, and never do this on matt, textured or natural stone.
Keep solvents off uPVC and aluminium frames, painted skirting and plastic fittings, which they soften and mark.
How to Remove Cement Stains From Tiles
Light cement film usually comes off without chemicals. Wet the area, leave it damp for 15 minutes, then work with a stiff nylon brush. For heavier marks on vitrified or ceramic tiles, white vinegar diluted half and half, left five to ten minutes, softens the deposit before brushing.
Vinegar is a mild acid safe on glazed and vitrified tiles, not on marble, Kota or any natural stone.
Removing Dried Cement and Mortar Residue
- Chip away the bulk with a wooden or hard plastic scraper. Never use a hammer and chisel on a laid tile.
- Soak the remaining film in warm water for 20 minutes, then brush.
- Only if needed, use a diluted acid-based cement remover on vitrified or ceramic tiles only.
If you use an acid cleaner, follow these without exception:
- Dilute as the label states. Neat acid damages grout and tile edges.
- Always add acid to water, never water to acid.
- Wear rubber gloves and eye protection.
- Ventilate the room and keep children away.
- Wet the grout lines first, so they absorb less acid.
- Work in small sections, contact time under five minutes.
- Rinse completely, twice.
- Never mix with bleach, phenyl or any chlorine cleaner.
Acid also attacks metal — keep it off taps, drain covers and frames.
How to Remove Grout Haze From Tiles
Grout haze is the cloudy film left after grouting, and the most common complaint on new floors.
- Within 24 hours, warm water and a cheesecloth will take it off. Change the water often — a dirty cloth redistributes the haze.
- After a few days, use a grout haze remover suited to your tile.
- For epoxy grout, ordinary cleaners will not work. Use an epoxy haze remover quickly, since cured epoxy is extremely difficult to shift.
Never use a metal scourer — it leaves fine scratches that show as dull streaks once the floor is polished.
Tools and Cleaning Solutions You Can Use Safely
- Tools: plastic or wooden scraper, stiff nylon brush, old toothbrush for grout lines, microfibre cloths, bucket, sponge, squeegee, gloves, eye protection and a mask.
- Solutions, mildest first: warm soapy water, baking soda paste, diluted white vinegar (not on natural stone), mineral turpentine for paint, grout haze remover, diluted acid-based cement remover (not on natural stone).
Start with the mildest option that might work and move up only if it fails.
Common Cleaning Mistakes That Can Damage Tiles
- Acid on marble, Kota or granite. The etching is permanent; only re-polishing fixes it.
- Mixing acid with bleach or phenyl, which releases chlorine gas.
- Metal scourers and steel wool, which scratch glaze and dull the finish.
- Using acid neat instead of diluting it.
- Leaving cleaner on too long, which eats grout and loosens tile edges.
- Not rinsing properly. Residue attracts dirt and leaves a film.
- Cleaning a whole floor before testing one hidden tile.
- Waiting. Every one of these stains is easier on day one.
How to Clean Tiles After Construction or Renovation
Work in this order, or you will clean the same floor twice.
- Dry sweep to remove grit, which scratches during mopping.
- Scrape the lumps with a plastic scraper.
- Treat stains by type, mildest method first.
- Wash with mild detergent, then rinse twice if you used any chemical.
- Dry with a squeegee — standing water leaves marks.
- Inspect in daylight at an angle. Haze only shows in raking light.
Do the floors last, after painting, electrical fit-out and window and door installation.
How to Prevent Construction Stains During Future Work
- Cover finished floors with plastic sheeting, then cardboard, taped down so slurry cannot run underneath.
- Clean grout haze the same day.
- Mask skirting, frames and sanitaryware before painting starts.
- Wipe splashes immediately, not at the end of the day.
- Sequence the work — messy trades first, finishes last.
Windows deserve the same care. Cement slurry sets hard on glass, and aggressive cleaning is how scratches appear. Keep frames covered until handover and get splashes wiped while wet. IndiFrame installs its uPVC windows and doors as part of the supply, so protective film stays on through site work and comes off at handover.
Final Tips for Clean and Stain-Free Tiles
Identify the tile, test in a corner, start mild, and give the cleaner time to work instead of applying force. That handles almost every construction stain without damaging the surface.
If a stain will not lift after two careful attempts, call a professional. Replacing one etched marble tile costs far more than a cleaning visit, and matching the batch is rarely possible.