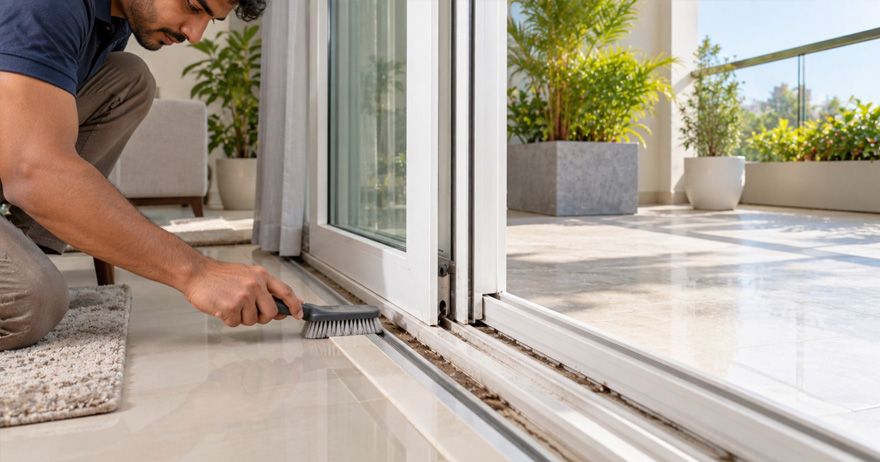
Why Do Sliding Tracks Collect Dirt and Debris?
It's common for everything in your home to accumulate dust, dirt, sand, hair, insects, and other debris. Because a sliding track is a narrow, three-edge hardware system that helps window panes glide smoothly, it can easily become a hotspot for trapping these particulates. Additionally, because it's exposed to the elements, rain and moisture can make dry dirt even thicker. Plus, the rollers that help them glide through the tracks can pack these moistened particles even tighter, making them harder to clean.
Signs That Your Sliding Track Needs Cleaning
The first and only sign that your sliding track needs cleaning is the dirt itself. If you see dirt, clean it! There is no rocket science. That said, periodically cleaning your sliding window tracks keeps them clean and reduces visual clutter, lowering stress and cognitive load.
However, if that is not convincing enough, here are the times when it is non-negotiable to clean your sliding window tracks.
Window panes are harder to glide.
Window panes can become difficult to glide through when dust accumulates in the tracks. This can include panes getting stuck, jerking at multiple points, or feeling too heavy to push or pull.
Screeching noises when gliding
When rollers below the pane glide through accumulated dust and debris in the track, it can create uncomfortable scraping sounds. This is attributed to the nature of the dust or debris, which can become rough, prickly, and rocky.
Waterlogging and leaks
Even if your windows have drainage holes, dust and debris can clog the tracks and the holes, causing water leakage and accumulation.
How to Clean uPVC Sliding Tracks Safely
What do you need to remove loose dust and debris from sliding tracks?
If your track has accumulated loose dust and debris, you need the following to clean a sliding window’s track:
- Handheld Vacuum: A vacuum with a narrow crevice attachment sucks up loose dirt, dust, and pet hair from tight corners.
- Old Toothbrush: A dry toothbrush sweeps out dirt and dust from narrow cracks and tight crevices.
- Paintbrush: A small soft paintbrush sweeps loose grit out of deep grooves before you vacuum.
- Microfiber Cloth: A dry cloth wipes away remaining surface dust.
How to remove loose dust and debris from sliding tracks
- Dry Sweep First: Take a dry, stiff paintbrush, old toothbrush, or small cleaning brush and scrub along the tracks. Focus on corners and crevices to dislodge dried dirt, hair, and dust. Always do this while the track is completely dry so you do not turn the debris into mud.
- Vacuum the Debris: Use a vacuum cleaner equipped with a narrow crevice tool or a small brush attachment to suck up all the swept-up particles.
- Improvise for Tight Spaces: If your vacuum nozzle is too wide for the track, attach a flattened paper towel roll or a narrow plastic adapter to the end of the hose to reach deep into narrow corners.
What do you need to clean stubborn dirt from sliding tracks?
- Vacuum cleaner with a narrow crevice attachment to suck up dry dirt, sand, and hair before it turns into mud.
- Stiff or soft-bristled brush (like an old toothbrush) to sweep and scrub tight corners.
- Baking soda and white vinegar, which create a chemical reaction that bubbles and breaks down caked-on, greasy grime.
- Warm water and dish soap for routine washing after the loose grit is gone (or a mild multi-purpose cleaner).
- Paper towels or rags wrapped around a butter knife or flat-bladed screwdriver to dig stubborn gunk out of sharp 90-degree corners.
- Microfiber cloths to wipe away dirty residue and completely dry the track.
- Silicone-based lubricant to re-coat the track so the door glides smoothly without attracting fresh dust.
How to clean stubborn dirt from sliding tracks
- Remove loose debris: Vacuum the track using a crevice tool or sweep it out with a dry toothbrush or paintbrush to clear away loose dust, hair, and sand before adding any liquids.
- Apply baking soda: Sprinkle baking soda generously along the tracks, focusing heavily on the caked-on, stubborn areas and corners.
- Spray with vinegar: Fill a spray bottle with equal parts water and white vinegar, then spray it over the baking soda. Let the mixture fizz and sit for 5 to 10 minutes to break down the hardened grease and dirt.
- Scrub the grime: Use an old toothbrush or a stiff, narrow brush to scrub the loosened dirt from one end of the track to the other. For tight corners or grooves, wrap a microfiber cloth around a flathead screwdriver, butter knife, or putty knife to scrape away debris.
- Wipe and dry: Wipe away the dirty residue with a damp cloth or paper towels. Then dry the track completely with a clean towel to prevent sticky buildup or rust.
- Lubricate: Apply a light silicone-based lubricant to the clean track and slide the door or window back and forth a few times to ensure smooth operation.
Cleaning Sliding Window and Door Drainage Holes
Drainage holes help discharge dirt outside the house. Here’s how you can bring it to your advantage when cleaning sliding window panes and tracks:
- Vacuum or wipe the main track first to remove loose dirt, dead bugs, and dry leaves.
- Locate the weep holes on the outside bottom edge of the frame or inside the bottom track channel.
- Clear blockages by gently inserting a paperclip, piece of thin wire, pipe cleaner, or small flathead screwdriver into the drainage hole. Be careful not to push dirt further inside.
- Flush the system by pouring a small amount of water into the window or door track to make sure it flows cleanly out of the exterior drainage vents.
- Scrub stubborn residue like mould or algae using mild soapy water or a vinegar solution with a small brush or old toothbrush.
Should You Lubricate Sliding Tracks?
If you read the essentials and steps to clean the sliding tracks, we emphasised lubricating the sliding tracks of your uPVC sliding windows. This is because lubrication reduces friction by creating a slippery layer, which helps prevent wear and tear and creaking noises, thereby extending the lifespan of your uPVC sliding windows cost-effectively. Choose a silicone-based or dry PTFE lubricant. Never use heavy grease or oil-based products like WD-40 on exposed tracks, as they attract dust and build up thick grime over time.
Common Sliding Track Cleaning Mistakes to Avoid
- Don’t use abrasive cleaners. Don’t use harsh solvents or bleach.
- Don’t scrape with sharp objects.
- Don’t use WD-40 or heavy oils on tracks.
And here’s why…
Abrasive cleaners include gritty scouring powders, cream cleaners, baking soda paste, steel wool, and stiff nylon scrubbing brushes. Avoid them because they act like sandpaper, grinding away the smooth, protective outer glaze of the uPVC. This creates millions of microscopic scratches that permanently strip the windows of their shine and trap dirt, pollution, and mould, making the frames progressively harder to clean over time.
Harsh solvents and bleach include household chlorine bleach, acetone, nail polish remover, methylated spirits, WD-40, and oil-based cleaners. These chemicals are dangerous to uPVC because they trigger a chemical reaction that degrades the plastic stabilisers, leading to permanent yellowing, fading, or blotchy discolouration. Strong solvents can also melt or soften the plastic surface, dissolve the adhesives holding decorative wood-grain foils, and dry out the vital rubber weather gaskets, causing them to crack and leak.
Also, you should never scrape uPVC windows with sharp objects—such as razor blades, putty knives, screwdrivers, or steel wool—because they cause serious, irreversible physical damage to the frames and glass. Because uPVC is a relatively soft vinyl plastic, any sharp metal edge will easily gouge, slice, or plough deep furrows into the material.
Unlike wood or metal, uPVC cannot be easily filled, sanded, or repainted, meaning any scratch or gouge is permanent. Scraping also shaves off the smooth, factory-sealed outer gloss layer, exposing the more porous plastic underneath to UV damage, rapid yellowing, and deep-set dirt accumulation. Furthermore, slipping with a sharp tool can easily scratch the glass pane or puncture the rubber weather seals, ruining the window's energy efficiency and waterproofing.
How Often Should Sliding Tracks Be Cleaned?
While the internet may say once a month, as an Indian brand serving uPVC fenestration end-to-end for Indian households, it is a very Indian thing (and of course very basic) to say - every week or 2 is a must. We live in an environment prone to natural and artificial particulates. Whether you live in a dusty, low AQI city or a clean, unpolluted city, it does not matter - there will be varying levels of dirt in your sliding tracks that have to be cleaned.
Final Tips for Smooth Sliding Windows and Doors
uPVC Sliding Doors and Windows aren’t complicated to operate or maintain! But do not underestimate the exposure they face. As an end-to-end fenestration brand specialising in uPVC windows, we know what our customers’ day-to-day lives look like, so we have delved deep into how to make our uPVC windows and doors outperform expectations for a uPVC product. Follow this guide and apply it in your daily chores to help your uPVC sliding doors and windows last longer.